
EssentialPIM 11.5 has been released and includes a number of enhancements.
Let's look at several, beginning with tasks, which are easier to create, organize, and find with the introduction of "quick task" and Smart Lists.
A faster way to create tasks
At the top of tasks in either the main list or the sidebar is a new, blank row with the prompt, "Add a task" in the subject (Figure 1). This allows you to create a new task without opening the dialog window. Type in the Subject field, press enter, and EPIM adds it to the list. This is a quick way to build a to-do list or to record something where you'll fill in details later.
You can add details before entering a quick task by clicking in the fields, then clicking outside the task. Once a task is added to the list, you can edit it without opening the dialog by clicking once to select the task and click again in the desired field. Double-click a task to open the dialog.
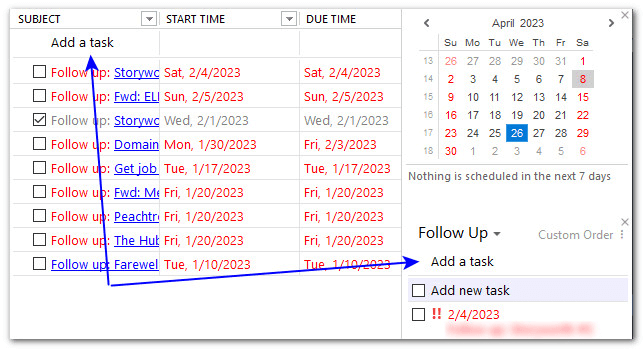
Figure 1. The new "Add a task" appears at the top of tasks in either the main list or the sidebar.
Faster ways to find tasks
Smart Lists and a new search function in the Tasks sidebar facilitate finding tasks.
Smart Lists are pre-defined filters for viewing All, Important, Flagged, and Completed tasks. Figure 2 shows three controls for managing these Smart Lists.
- Click the arrow to expand or reduce the display.
- Click options to choose which lists to display. Uncheck the lists you don't want to see (whether they have tasks or not) or let EPIM automatically hide empty lists (Figure 2, #2).
- Click the 'X' to close the Smart Lists display altogether.
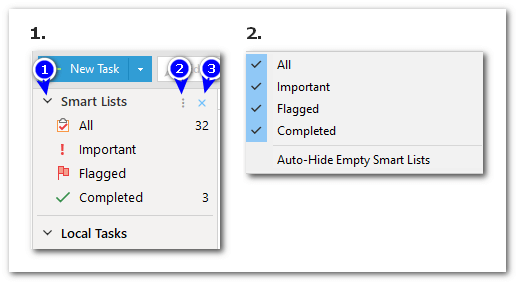
Figure 2. "Smart Lists" comprise filters for quickly viewing all, important, flagged, or completed tasks.
Here are some tips about how these lists work.
- Smart Lists switch the view to Consolidated, displaying tasks across all of your lists.
- Flagged tasks are email messages you schedule for follow-up.
- The Important list contains high or highest-priority tasks.
- The Smart List of completed tasks ignores the hide-completed-items filter (Ctrl+H). This is a convenient way to see all completed tasks, across all lists, in one place.
- Column filters affect the Smart Lists. For example, Figure 3 shows five important tasks: two high and three highest priority. In Figure 4, I set the priority filter to display only the highest priority. The Smart List still shows there are five important tasks, but only the three with the highest priority display, per the column filter.
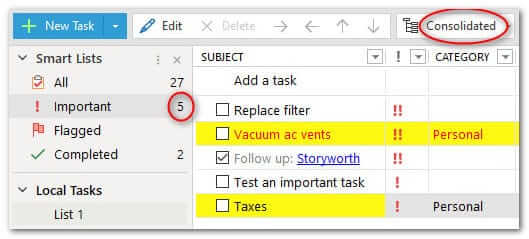
Figure 3. Smart Lists present a consolidated view of tasks across all lists.
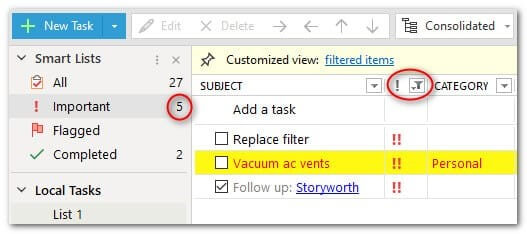
Figure 4. The Smart List of important tasks has five in all, but the priority column filter is set to display only the highest priority tasks.
Search added to the tasks sidebar
A search function has been added for tasks in the sidebars. Access this by clicking on Custom Order (#2 in Figure 5), which brings up the menu in Figure 6.
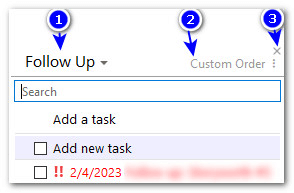
Figure 5. The sidebar pane for tasks has options to 1) change lists; 2) change the display, and 3) close the tasks pane in the sidebar.
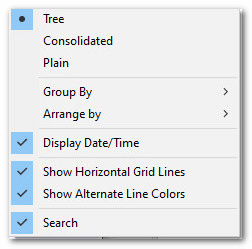
Figure 6. This menu contains the Custom Order options, including the display of the search window above the new “Add a task” feature.
The Navigation Pane goes flexible
The Navigation Pane has become flexible in EPIM v11.5. Figure 7 shows how you can expand the pane from icons only (#1) to both icons and labels (#2). The expansion is temporary when the button looks like a push-pin (the panel collapses once you click anywhere else). To expand the pane permanently, click the push-pin so it looks like the arrow in #3.
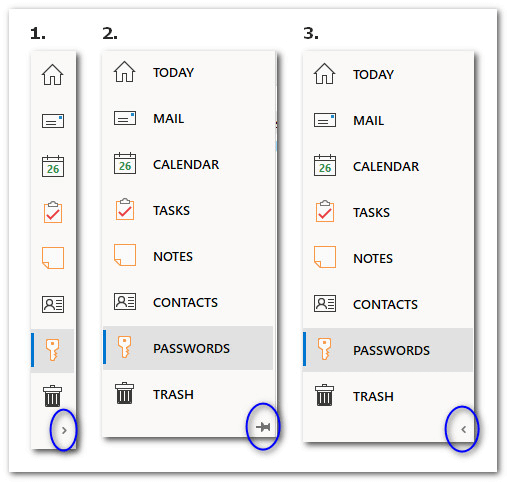
Figure 7. The push-pin (#2) indicates the Navigation Pane is temporarily expanded—the pane will shrink to icons only (#1) when you resume work. #3 shows the pane permanently expanded.
Quick search returns results
Two visual improvements have been added to quick search—the box that appears in the top right of each module.
- The search field now displays not only where it looks, but also the shortcut for accessing it (Figure 8, #1).
- Quick Search returns the results adjacent to the search box (Figure 8, #2). If there are no matches, EPIM also displays a message in the main window (Figure 8, #3).
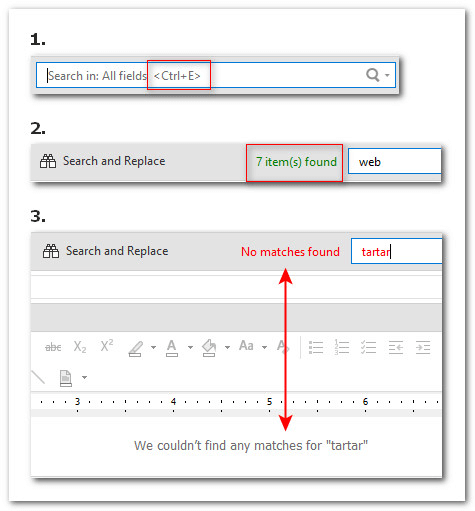
Figure 8. Visual enhancements for quick search.
Add canned copy to email messages
Canned email responses are easier to insert and manage with a new button on the email toolbar (Figure 9). Click on the button in a new message or one you are replying to, and a menu comes up from which you can select static content (Figure 10, #1). There are also options to convert the current response to canned content or to manage this library (Figure 10, #2).
When you choose "Save as response," EPIM presents the body of the open message in the response text box, where you can revise it as needed. It also creates the name of the new item from the first 27 characters of the response, but you can rename it as needed (Figure 11)
To create a new canned item, select Manage and Add New.

Figure 9. A new button on the email toolbar speeds access to canned content.
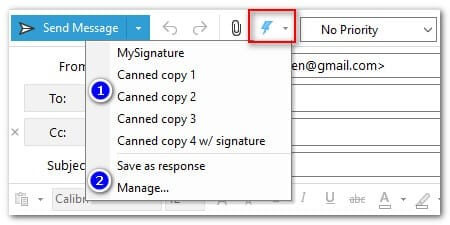
Figure 10. The menu for adding or managing canned email content.
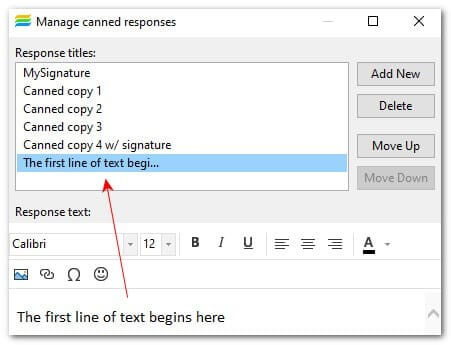
Figure 11. EPIM uses the first 27 characters to populate the name of a new entry. You can change it.
Does anything here raise questions? Use the comments to ask and we will respond.
Reviews & Comments