
I am new to sticky notes, even though EssentialPIM introduced them in 2008 and I began using EPIM three years earlier.
I resisted digital stickies because they cluttered the screen, but they have evolved through the years into less invasive, helpful organizers and I use them regularly.
In this post, we'll look at what some users say is their favorite feature of EPIM. While researching, I discovered that certain shortcomings which some reported have been resolved.
Here's how I use sticky notes
Figure 1 shows my setup using two sticky notes. Today's Agenda has three leaves:
- Meeting Notes;
- Morning Checkout, and
- a scratchpad.
To Do is my second sticky for notes or tasks that pop up during the day when I may want to set a reminder. I group the two notes to minimize clutter.
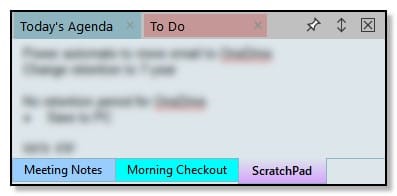
Figure 1. I group two sticky notes for work.
There are three ways to make any note in EssentialPIM sticky. (You can also select multiple notes and follow these steps.)
- Right-click on the note and select Sticky from the context menu (Figure 2);
- Select the note and click on the Sticky button on the main toolbar;
- Select the note and go to Actions > Sticky on the menu.
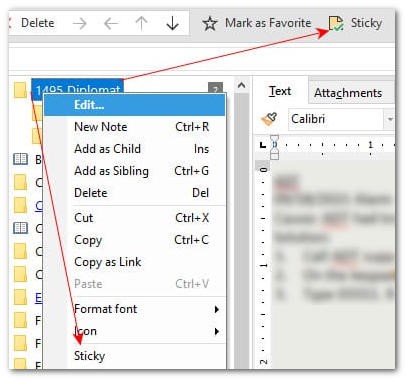
Figure 2. Here are two ways to make a note sticky. Select the note, then right-click and select Sticky from the context menu, or click the toolbar button.
2 ways to keep stickies tidy: unpinned and groups
By default, a sticky note starts unpinned (Figure 3) and will disappear when the focus changes. Click on the push pin to keep the note visible.
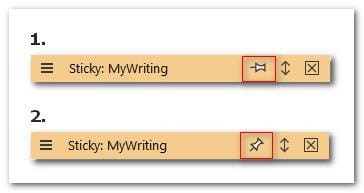
Figure 3. In #1, the note is unpinned and will hide when the focus shifts. The note is pinned in #2 to stay on top.
The more stickies you create, of course, the more cluttered your workspace can become. One way to control this is to leave stickies unpinned. Use the shortcut Ctrl+shift+I (the default) to display all stickies; they will automatically disappear when you resume work.
There is no toggle to display/hide a pinned note. By definition, a pinned note is meant to stay on top. To hide one, unpin it.
 The x-box at the right of the note's title bar hides the note by removing its sticky attribute, therefore the shortcut to display all stickies will not make a note closed this way visible. You will need to make it sticky again.
Grouped vs. individual notes
Another way to tame sticky notes is to group them. Drag one on top of another and EPIM will combine them. The chart below compares options for working with grouped and individual sticky notes.
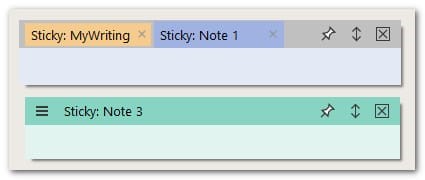
Figure 4. This shows grouped notes (top) compared with the individual Sticky: Note 3. The title bar of the individual note has a menu bar on the left; such a menu does not apply when multiple notes are combined.
| Function | Individual Note | Grouped Notes |
|---|---|---|
| Display menu | Click on the menu bar. | Right-click on the note's title bar. |
| Rename the note | - Menu > rename, or - Left-click in the title bar. |
Right-click the note's title bar and select Rename from the menu. |
| Display/hide the note's content | - Double-click the title bar, or - Click the roll up/down button (↕). |
Click the roll up/down button (↕). |
| Resize the depth or width of note(s) | 1. Hover the mouse over the top/bottom or left/right border of the note until the cursor becomes a double arrow (↕). 2. Click and drag to the desired size. |
1. Hover the mouse over the top/bottom or left/right border of the group until the cursor becomes a double arrow (↕). 2. Click and drag to the desired size. |
| Resize the depth and width simultaneously | 1. Hover the mouse over any corner until it becomes a double arrow (↕). 2. Click and drag to the desired size. |
|
Common formatting features available in stickies
More than one user lamented the lack of formatting tools when EPIM introduced sticky notes. The formatting toolbar in the Notes module does not appear in a sticky note, but the common formats are available through shortcuts.
| Feature | Keys |
|---|---|
| Bold | Ctrl+b |
| Italic | Ctrl+i |
| Underline | Ctrl+u |
| Strikeout | Alt+x |
| Checklists | Alt+c |
| Bullet list | Alt+l |
| Numbered list | Alt-n |
| Insert Horizontal rule | 3 dashes + enter |
| Insert date and time | Ctrl + Space |
| Create or add tags | # (or ##) + text (see Figure 5) |
| Insert a link to an item | @ + text (see Figure 6) |
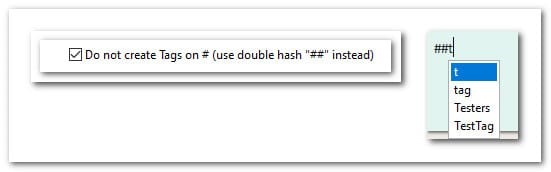
Figure 5. Depending on your choice in Tools > Options, EPIM will display tags, if any, that match the text you type after the hash mark(s).
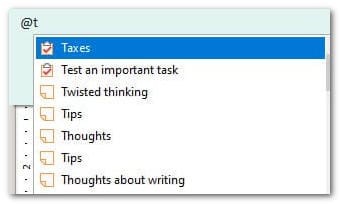
Figure 6. Sticky notes support inserting links to other EPIM items. Type '@' followed by text, and EPIM displays matching items for you to choose from.
Additional tips and tricks
- Drag an image to a sticky note and EPIM will drop it in line with the text. Stickies do not support drag and drop for other file types.
- EPIM saves changes to a sticky note when the focus changes. This means there is a risk of losing data if there is a system failure while you are updating a sticky note. If you are making a lot of updates, change focus occasionally to save your work.
- You can create multiple groups of sticky notes. Display the notes you want to group, then drag one on top of the other.
- There is a shortcut to show all stickies, but not to hide them all. There are two solutions to this:
1. Don't pin them. When you display all, stickies will remain visible until you click elsewhere in the program.
2. Use the sleep option and the note will disappear until the time you set it to wake. There is no option to sleep either all stickies or a group; you have to set each note individually. When you sleep a note that is in a group, it will wake up outside the group. Drag it back to the group to combine it again. - If you work in more than one database simultaneously and have sticky notes in each, distinguish them by including the database name in the note's title (Figure 7).

Figure 7. Label one sticky in a group with its file to distinguish its source when you are working in more than one database.
Are sticky notes one of your favorite features of EssentialPIM? How do you use them? Tell us about it in the comments below.