
You take the time to log your appointments and to dos, to record your contacts and notes, to secure passwords and connect your email, all to have your world at hand in your personal information manager.
But there is more than what you can type into your PIM. There are receipts, articles, documents, pictures and more that you also want to access. Attachments are the means for bringing in what’s outside.
In this post we'll review this important feature of EssentialPIM.
3 ways to add attachments now becomes 4
EPIM has supported attaching external files from the beginning, and along the way introduced the Attachments Manger (v4.5), the ability to drag and drop attachments between windows (v6.5), the option to exclude attachments when synchronizing with Android EPIM (v7.61) and previewing PDFs attached to notes (v9.4).
EPIM v9.8 introduces another significant improvement: a fourth way to attach files.
1. New with EPIM v9.8: drag and drop supported files into the Notes tree. The key words are supported files. You can drag text (TXT) or rich text (RTF) files onto the Notes tree, and EPIM will create the note's title from the file name and apply the default icon.
This new feature complements the other three longstanding ways of attaching files.
2. Attachments manager. This tool does many things that we'll look at below, but it includes adding attachments. Open the manager (Tools > Attachments Manager, or Ctrl+Shift+A) and
- Select an item in the ITEMS tab to see its attachments in the right pane
- Right click in the right pane
- Choose the Add option from the context menu
Note: This works only for items that already have attachments. To add the first attachment, try one of the following methods.
3. Drag and drop into an open item. In any module, open an item and drag the file(s) onto it. You'll be prompted whether to add as a link or as an attachment, which EPIM will store in the database.
Dragging picture files (.jpg, .png, .bmp, etc.) to a note works differently. EPIM will not ask how to attach an individual picture; rather, it inserts the picture as inline content. Drag multiple pictures to a note, however, and EPIM will prompt how to attach them.
You can use the next method to attach an individual picture to a note and not insert it as content.
4. The attachment icon. Items in all modules include the attachment icon  on the toolbar. Pressing this button brings up the open file dialog, where you can select one or more files to import.
Managing attachments
As your attachments accumulate, you have two ways to manage them.
The first is item by item within each module, where you can add attachments as described above, or delete them. You can toggle attachments to display either in a tab at the top (Figure 1) or as a list at the bottom of the item (Figure 2).
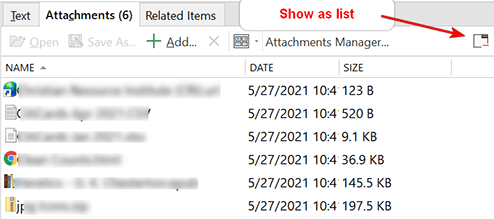
Figure 1. The attachments tab available in all modules. Click the "Show as list" icon to display attachments at the bottom (Figure 2).

Figure 2. Attachments as a list at the bottom of an item. Click the icon to change to tab view.
The second way is the Attachments manager, which brings together attachments throughout your database. It has two views.
Items tab
Items appear in the left pane; the right pane shows their attachments. Options are to open or delete an attachment, or add a new one.
Attachments tab
Attachments appear in left pane; the right pane shows items to which the file is attached or linked. In this view, you can only open or delete attachments. Linked files display in red if the link is broken. To remove these, go to File > Database Management and click the clear button for outdated links.
Finding attachments
While the manager is the primary attachments tool, you can also locate attachments in Advanced Search (Figure 3) or by making the attachment icon visible throughout EPIM.
Advanced Search under Tools (Ctrl-Shift-F) includes an option in the General tab to search file names.
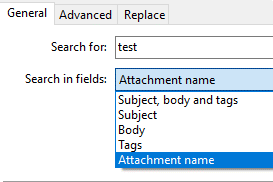
Figure 3. Advanced search option for finding attachments.
The Advanced tab extends search criteria but still allows setting the scope to attachments.
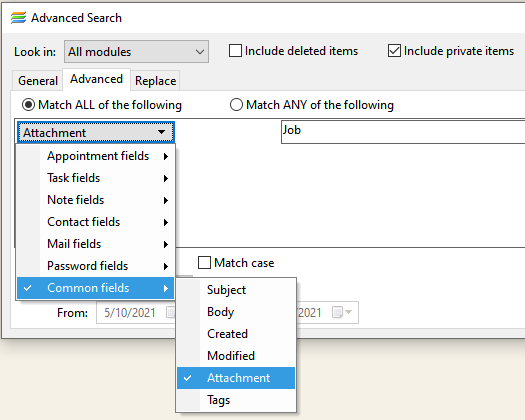
Figure 4. Extended search criteria for attachments in the Advanced tab.
The attachments icon increases their visibility throughout EPIM.
- A column to display attachments (Figure 5) is available in Calendar (table view), Tasks, Contacts, and Passwords.
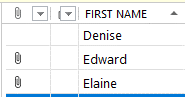
Figure 5. The attachments column improves visibility of attachments.
- In Notes and other Calendar views, the icon appears next to the title (Figure 6).
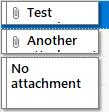
Figure 6. An example of Calendar entries that have attachments.
Miscellaneous tips
Here are a few tips when working with attachments.
- In Notes, all leaves in a note share the file(s) attached to the note itself. A request to restrict attachments to individual leaves is pending.
- When you drag a note from the tree into your file manager, EPIM creates the file as rich text (RTF). If the note has multiple leaves, all are included; you cannot drag and drop an individual leaf to create a file.
- The insert key allows you to attach files in all modules except Notes, where insert adds a new note. While you have an item open, press the insert key to launch the open file dialog.
- Only the first frame of animated GIFs is supported at the moment. Full support for these is in the works.
- We noted above that as of v9.4 you can attach and preview PDFs in Notes. Similarly, you can preview attached images inline in the Mail module.
Do you have a creative way of using or organizing attachments? Let us know in the comments.